VALVES

[Valve Repair]
Hydraulic valves do not need adjusting. Hydraulic arm must be replaced
--------
[http://www.geocities.com/MotorCity/Garage/5007/fiero_osg/lifters.html.]
Hydarulic valve lifters require very clean oil to function properly due to the very small internal clearances inside them.

Any oil contamination can either cause the lifter to stick or can cause the clearance to wear causing lost motion in the valve train and a small amount of noise.

I suspect that is your problem judging from the mileage and minor character of the noise.

They require no adjustments - ever. Tightening down the lash nut on the rocker is not a correct procedure for eliminating noise in the valve train. Doing so does, however, run the risk of collapsing the lifter and breaking something - likely the push rod but possibly something more expensive. Magic lubricants that claim to be able to unstick a "sticky lifter" do not work in about 99.7% of cases. They are a waste of money.

The only sure way to eliminate valve train noise is to replace the lifters - you really should do the whole set at once. There are 12 in a V6 and they likely don't cost more than about $10 each. You will need to remove the plenum and intake manifold and the lifters can normally be fished out with a small piece of wire with a hook bent into one end.
-------------
[http://members.aol.com/carleyware/library/misfire.htm.] A lean mixture in a single cylinder can be caused by a leaky intake manifold gasket, air leakage past injector O-rings, a leaky EGR valve (if the valve is adjacent to the cylinder intake port) or a dirty, plugged or inoperative fuel injector. Loss of compression because of a leaky (burned) exhaust valve or a leaky head gasket can also affect the spark burn line in the same way
---------------
[http://www.tigersunited.com/wsm/wsmB18.asp.] Needle fluctuates steadily as speed increases: -

A partial or complete loss of power in one or more cylinders caused by a leaking valve, cylinder head or intake manifold gasket leak, a defect in the ignition system or a weak valve spring.
--------
[ttp://www.iequus.com/manuals/3222E.pdf.] Burnt, leaky, or sticking valves: If the valves are burnt or leaking, the vacuum reading will dropevery time the defective valve or valves are inoperative. Anintermittent drop Indicates sticking valves
--------------
[http://www.international-auto.com/vacgauge.html.] Needle drops sharply on a regular rhythm Burnt valve, or a valve with clearance too tight
--------------
[http://www.birfield.com/archives/html/landcruisers/2003-03/msg02427.html.] (for Toyota Land Cruisers) So what I thought was going to be an intake manifold heat crack turned out to be a vacuum leak after all. A loose tensioning nut on the carb (Weber) butterfly shaft caused the intermittent air leak and rough idle symptoms only when the engine warmed up to operating temperature. Might be worth a look for those who run the 38mm Weber.

So after a bunch of hours of quality time under the hood, adjusting valves, replacing vacuum tubing, pulling carburetor, peering into the intake manafold and avoiding honey-do chores - it turned out that all it took was 20 seconds with a wrench to get my smooth idle back again. Jeff Zepps year-old advice to "get rid of that crappy little Weber and get a Jim C rebuild" is ringing in my ears, but for now I am satisfied with the performance. Life is good!
---------------
[http://www.2carpros.com/makes/dodge/colt.htm.] The intermittent problems you described are hard to diagnose. If possible, the car should be checked when the problem is present. When your car stalls, check for spark at the spark plugs, to isolate trouble in the ignition system. Next, test the fuel pressure to eliminate fuel pump and pump relay problems. You said you replaced the ignition coil; did you replace the ignition module as well?
--------------
[Valves, etc.]

[http://www.uniglide.co.za/product_info/faq_engine.html. ] Q. Why do I need to use Uniglide Engine Flush? Why do I really need to flush my engine and, if I need to flush my engine, how often should I do this? A. If your equipment is regularly maintained to manufacturer's recommendations, using engine flush would be recommended only once every two years. However, if services are skipped, or sub-standard lubricants have been used, or a used machine has been purchased, we would recommend it be flushed as a precautionary measure.

Q. Will Uniglide Engine Flush help to loosen sticky rings and sticking valves? Can it clean deposits on intake valves and exhaust valves?
A. Yes.

Q. Can the Uniglide Engine Flush help with sludging problems?
A. Yes, not only in engines but in gearboxes too.

Q. Why do I need to make an engine hot before Uniglide Engine Flush can do it's job properly?
A. Because it requires heat for the detergents in the flush to dissolve the unwanted deposits properly.

Q. After using Uniglide Engine Flush, will any residual flush not drained completely have any detrimental effects on the new oil?
A. No, in fact it will add to the detergent ability of the new oil

Q. What is in the Engine Flush that makes it so effective?
A. Uniglide Engine Flush contains the latest detergent and dispersant chemicals which are the strongest available.

Q. How long should ileave the Engine Flush in the engine before draining the old oil?
A. Maximum 10 minutes, especially in older engines, or the engine flush can do too much cleaning, by removing build-up on valve stems, and cause the engine to smoke afterwards.
---------------------------
[http://www.imperialclub.com/Repair/Engine/tests.htm.]
Assuming you have done the oil down the plug hole trick to see if anything changes? We used to take flathead Fords from Windmachines that had sat all winter and pull the plugs, add wd-40 , etc and crank the daylights out of them. Sometimes a stuck valve or ring would decide to play, other times it wouldn't.
-----------
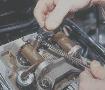
[Photo: http://www.cobralads.com/6000000/DSC00082.JPG (Website: http://www.cobralads.com/butcher56.html ) - Compresion tool for valve spring]
-----------

Valve Spring Replacement

[http://www.gnttype.org/techarea/engine/valves.html] Procedure: To remove the valve springs on the TR's while still leaving the heads intact is quite simple. I've done quite a few cars using the following method:

Remove both valve covers

Remove both sides of the rocker arm assembles.

Remove pushrods.(note: take extreme care while removing the pushrods. They are coated with oil and can be quite slippery. It's very easy to drop one and have it fall down into the motor)

Remove all 6 spark plugs.

Apply compressed air to a cylinder.

Take a small hammer and tap on the valve spring retainer. This helps unstick the keepers.

To allow leverage to remove the springs , especially on the rear cylinders, I used an L-shaped valve spring compressor, and a small pipe, about 1" diameter and about 1/2 the length of the cylinder head.
Drill 2 holes through the pipe so it can be mounted on the head using 2 on the rocker arm assembly bolts. the pipe will allow a place for you to get leverage to use the L-shaped compressor.

Apply pressure and compress the valve spring. Take care as not to push the valve open. doing so will release the compressed air and have the valve to fall.

Remove keepers with a magnet, remove retainer and valve springs. Now would be a great time to replace the valve seals if so desired. The exhaust valve doesn't use one.

Install new spring. Compress with L-shaped compressor. Once again take car in compressing the spring as not to push the valve open.
Install the keepers. Make sure they are seated properly in the grooves of the valves.

After I install the spring I lightly tap each one to make sure the keepers are seated.

Do the same for each cylinders. Install rocker arm assembles.
Torque to proper spec. and feel the rpms climb.
-------------
[http://forums.vmag.com/pm-0899/messages/1302.html ]
You will need a valve spring compression tool that can be used with the head on. Don¡¯t forget valve cover gaskets, engine oil, Engine filter, valve guide seals (I would use an umbrella type seal.), and spark plugs.

Disconnect battery. Remove the spark plugs. Remove the valve covers. Remove the rocker arms and push rods (keep in order for reinstallation). Pick a cylinder to start. Manually turn over the engine until BOTH VALVES are closed (you can see the rockers are not pushed up by the push rods). Hook up the compressed air to the cylinder (watch out the engine will turn some!). Make sure both valves are still closed. Remove the valve spring. Carefully pry off the old seal and install a new one. Reinstall the valve spring. Remove other valve spring. Replace seal and reinstall spring. Remove air from cylinder. Repeat for both valves on each cylinder (star at ¡°pick a cylinder to start¡±). Install new plugs. Reinstall rockers and adjust. Reinstall valve covers, and change engine oil.

The danger in this job is that you will drop a valve into the cylinder and have to remove the head to get it back out. The air will hold the valve tightly in place. The two ways you could ¡°drop¡± a valve into the cylinder: One, you remove a spring from a cylinder that has no air (don¡¯t drink beer and pay attention). Two, the air system fails while working and the valve falls in. Keep a clothespin handy. If the air fails you can clothespin the valve stem and go fix it.
----------
[http://autorepair.about.com/library/faqs/bl732.htm] Under normal conditions the valves should not have to be adjusted since the lifters are hydraulic. There is a way to check the valve clearance but it requires a special tool. Lacking that tool, you can use a big screwdriver.

Take off the valve cover and turn the crankshaft until #1 cylinder is at Top Dead Center (TDC) on the compression stroke. The timing marks on the crank and cam gear will be together. In this position you can check #1 Intake, #1 Exhaust. #2 Intake and #3 exhaust valves. With the appropriate tool, push down on the lifter until it is completely collapsed. Next, use a feeler gauge to check the clearance between the rocker arm and valve stem. It should be 0.075 to 0.174 inches.

Now rotate the crankshaft one complete turn and check the clearance on #2 Exhaust, #3 Intake, #4 Intake and #4 Exhaust. If they are out of spec, they can be adjusted by buying longer or shorter push rods. If the clearance is less, you need a shorter push rod. If it is more than specified, then you need a longer push rod.

Now this is assuming there aren't any collapsed lifters or extreme wear on the valve train parts. Do a complete visual inspection on the camshaft, rocker arms, push rods and pads. The pads should be nice and flat, if they are dished out, they need to be replaced. Look at where the rockers meet the pads and see if they are worn down. Same thing for the push rods. You also need to look at the lobes on the cam. Is there a wide grove where the arm rides on the cam lobe? If there is, then the camshaft is worn out, possibly beyond adjustment.


The lifters have a small hole on the side, inside the lifter is a check valve consisting of a small steel ball and spring. Sometimes the spring breaks or wears out, or dirt gets inside and doesn't allow the ball to seal. This would require replacement to repair.

All the parts are available separately. Someone may have a "kit" as a performance package, but you don't need that. I would recommend that if you're going to replace parts, do it as a set. Replace all the rockers or replace all the pads etc. There's no reason why you can't do this job yourself. It's pretty simple and straight forward. If you go to remove a rocker arm, make sure there is no pressure on it. This will prevent stripping or bending the rocker arm bolts or studs. I would allow 3 or 4 hours to do the job.

If you do need to replace parts, I would recommend checking the valve clearance again before starting the car and pumping up the lifters. With new parts you may need to make adjustments.
-----------------------------
[http://www.sacskyranch.com/eng58.htm.]

Guide Boss Alignment: Poor alignment occurs when a guide boss reams off-center. With the guide boss off-center the guide does not align the valve onto the center of the seat. This is evident if you inspect how the seat grinder grinds the seat face. The seat grinder has a pilot that aligns the grinding stone to the guide. If the center of the guide doesn't coincide with the center of the seat the stone is not positioned onto the center of the seat. The stone cuts the seat more on one side than the other This creates a wide face on one side of the seat and a narrow face on the other side. If the seat grinder ground more on one side of the seat than another it means that most of the contact pressure occurs one side of the seat. The valve will behave in the same way; most of the contact pressure will be on one side of the seat. This uneven pressure pounds the seat face oblong which causes the valve to leak.

Valve guides must be perpendicular to the spring seat. If the guide is not perpendicular, then the springs hold the valve to one side, forcing it against the guide. Check guide perpendicularity by fixing a dial indicator on the guide with the indicating arm indexing from the spring seat. Rotate the dial indicator. Run-out should be less than .005 inch. Guide misalignment occurs due to several reasons. Welding of the guide boss and then not accurately boring the guide boss, Reaming off-center, and forcing the guide in the boss. A crooked spring also forces the valve stem against the guide. Place the valve springs against a straight edge and check for straightness.
---------------------
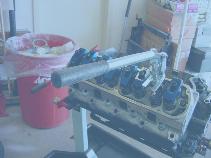
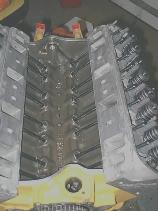
[photo: http://www.houston-f-body.org/tech/LS1Cam/images/pushrods-sm.jpg ; website: http://www.houston-f-body.org/tech/LS1Cam/cam4.html] / [Photo: http://www.fast351.com/enginerebuild/images/pushrods.jpg ; Website: www.fast351.com/enginerebuild/ index8.htm]
---------

[http://www.houston-f-body.org/tech/LS1Cam/cam4.html ]
Install the pushrods in the same order they were removed. Press each down and hear a satisfying "thunk" as the lifter contacts the camshaft.
----------------
[http://www.imperialclub.com/Repair/Engine/cylinder.htm.]
One thing you can try which has a fair chance of helping, and it's cheap and easy: Remove the valve covers and ream the crud out of the drain holes at each end of each head so that any oil which accumulates in the rocker chamber drains back to the crankcase as quickly as it did when the car was new. You will need a new set of valve cover gaskets and a very long (18" or so) handled brush with about a 5/16" diameter to reach all the way to the oil pan from the top of the head. Try a gun shop for this. You cannot damage anything, and you might be amazed at how gunked up the drains are.

This will be an opportunity to stick a blunt but small probe through the valve springs to test the resilience of the valve stem seals. These are small mushroom shaped cups that fit over the valve stems against the head boss and keep the oil in the rocker chamber from coating the valve stems so that it cannot be sucked into the intake chamber. If these are hard as glass, you can replace them without removing the head, but it's a little tricky. You have to compress each valve spring, remove the keepers and the top washer, then relax the spring compressor and take off the spring and the old stem seal. Then replace everything the same way and go on to the next valve. The tricky part is keeping the valve up tight against the head while you do this. I use a modified spark plug which I connect to my air compressor (of course the other valve on this cylinder has to be closed, so you have to be prepared to rotate the engine a couple of times to do all the cylinders.) You will need a set of 8 exhaust and 8 intake valve stem seals from your local parts store, but they are cheap. Your major expense will be to buy a good valve spring compressor, but you will use it many times on your cars. You can rent one also. Your other major expense will be hand cleaner.
-------------
[http://www.flatlanderracing.com/pushrodsgmbb.html]

10134305
Premium 7/16" Exhaust Pushrod
$14

GM engineers designed this premium quality pushrod to stand up to the stiffest valve springs. It is made from tough 4130 chrome moly steel tubing with a .080" wall thickness. This superior material significantly increases both strength and stiffness. Loose or misaligned tips are never a problem with this pushrod's one-piece design. Premium quality GM Performance Parts pushrods are case hardened for use with guideplates.  
Technical Notes: This pushrod is 9.256" long. Use with guideplate P/N 3879620.

10134306
Premium 7/16" Intake Pushrod
$13

This premium quality pushrod has the same outstanding features as the 4130 chrome moly steel exhaust pushrod described above. It is 8.285" long.  

------------------------
[From an aircraft site: http://www.avweb.com/news/maint/182894-1.html ]
Dealing with Stuck Valves

If your engine seems rough when first started, it might be giving you an early warning of a stuck valve. Failure to heed this warning and correct the situation promptly could cost you an engine teardown, or even result in a catastrophic engine failure and a forced landing. Here's the lowdown on why valves stick and what to do about it.

Stuck valves are usually caused by a build-up of deposits and/or corrosion on the valve stem. Because the fit of the stem in the guide is so snug, it doesn't take much build-up on the valve stem to interfere with free movement of the valve within the guide.

What makes valves stick? - Valve sticking is influenced both by the design of the engine and the environment in which it is operated. Lycomings have more valve sticking problem than Continentals. Hot-running engines stick valves more often than cool-running ones. Valves are more likely to stick in hot summer weather than in cold winter months. The use of heavily-leaded fuels and inadequate leaning can lead to valve sticking, as can infrequent oil changes.

Heat is the primary cause of valve sticking. High temperatures in the exhaust valve guide oxidizes oil and forms carbon deposits on the valve guide, and these deposits can cause the valve to stick. The most frequent reason for elevated valve temperatures is valve leakage.
All of the combustion gas must pass around the valve face as it goes out the exhaust port. The large heat-absorbing surface of the exhaust valve face must conduct heat away from its surface. A valve that is not contacting its seat properly (i.e., is leaking) cannot conduct as much heat into the cylinder head as a valve with good seating.

Engine operating environment:

Environmental influences that create valve sticking are: high temperatures, dirty oil, high-lead fuels, hot engine shut-downs, and poor engine baffling. Improper leaning can also be a culprit: an engine that is run excessively rich will build up carbon, lead, and other combusion-related deposits on exhaust valve stems more quickly. On the other hand, an engine that is leaned excessively during high-power operation will experience high valve temperatures, and this contributes to valve sticking.

Engine overhaul shops can't do much to prevent valve sticking. They cannot change the engineering of the engine, and have little control over its operating environment. About all they can do is to use the correct parts (valves, guides, seats, rotators, etc.), to dimensionally match the parts carefully, and to control the surface finish of the guide by careful reaming and honing.

Your regular maintenance shop can influence the operating environment by checking the engine's health regularly (via compression checks, oil analysis, filter inspection, etc.), by making sure the cooling baffles are in good shape and the magneto timing is correct, and by changing the oil frequently.

What happens whan a valve sticks?
When an engine has a stuck valve, one of five things can happen, each of which is bad news:

The pushrod bends. /

The surface of the camshaft or cam follower fails. /

The valve opens but won't close. /

The rocker support breaks. /

A valve that sticks closed will often result in serious and costly engine damage. Each time the cam-tappet-pushrod-rocker try to open that stuck valve, you risk catastrophic engine damage. With a stuck valve, the valve doesn't want to move. Tremendous valve train forces develop as the camshaft lobe tries to force the valve open. The camshaft follower and lobe are the most highly-stressed components of the engine even under normal conditions...the additional loading caused by a stuck valve may induce catastrophic failure of the rocker support, pushrod, cam follower, or cam lobe.

A damaged camshaft lobe requires complete engine removal and teardown. The same is true of a damaged cam follower if it is the mushroom-head variety used in many Lycoming engines.

Sometimes an exhaust valve that is stuck closed can cause the intake pushrod to bed or the intake rocker support boss to break. How can this happen? If the exhaust valve sticks closed, exhaust gases will not exit from the cylinder. Gas pressure within the cylinder then prevents the intake valve from opening. If this happens, something's gotta give. Either the pushrod bends or the rocker support breaks.

You might think that a valve that sticks open is a much less serious situation, but that's not necessarily so. If the valve is an intake valve, you lose power and will need to make a forced landing. If the valve is an exhaust valve, there will not be any compression on that cylinder.

In either case, if the valve spring can't close the valve, the entire valve train (cam follower, pushrod, and rocker arm) unloads. The end of the pushrod that rests in the socket in the cam follower may come out of the socket and fling around inside the tappet boss. If the pushrod ball does not locate itself back into the socket when the cam lobe comes around, it may jam against the tappet housing, usually causing crankcase damage.

Engine damage does not always occur when the valve sticks, but the longer the engine operates in this condition, the greater the chances are that some damage will occur.


Do not use Marvel Mystery Oil or other solvents to un-stick a valve. Solvents may un-stick the valve in time but not immediately. Eventually the valve may un-stick, but not before your camshaft lobes have been damaged.

Solvent treatments dissolve the outer deposit layers in the guide boss and temporarily un-stick the valve. The remaining deposits push the valve over to the opposite side of the guide and cause rapid, uneven guide wear. The valve stem may stick or it may cause rapid guide wear where the stem is forced against the guide material opposite of the deposit buildup.
-------------
[http://www.sacskyranch.com/eng176.htm.] {aircraft] Many factors influence this environment, including: engine temperature, engine design, engine installation, baffle condition, operational technique, oil, fuel, and frequency of oil changes. Even ambient temperatures have a great influence on valve sticking. Valves stick more in the hot summer months than in the cold winter months.
----------
{Leaky Valve}

[http://www.cathken.com/switch.html] What occurs when you use AMSOIL Engine Flush is that it cleans all these deposits out from your engine, both the highly accumulated deposits as well as the sub-micron deposits which have accumulated in the microscopic valleys of the aluminum, copper, iron, etc.. engine components. If you do not use the engine flush the AMSOIL Synthetic Motor Oil will do essentially the same thing the flush does but take a much longer period of time. During this time, which is greatly accelerated when using the AMSOIL Engine Flush, the engine is going through a phase where these deposits are being removed, or have been removed. What exists now is that these microscopic valleys in the iron, aluminum, copper, etc.., are now empty. It takes some time for the molecular structure of the AMSOIL Syntheitc Motor Oil to fill these microscopic valleys. This can be as short as a few hundred miles or as long as a few thousand miles, depending on the internal condition of your engine. During this phase you may, or may not, notice slightly increased oil consumption BUT only until the uniform molecular structure of the AMSOIL Synthetic Motor Oil can re-seal these microscopic valleys. Most people do not even notice this phase, but we like to make people aware of it so they understand this process. This is perfectly normal and the oil is doing exactly what it was engineered to do.

You may have heard the myth that synthetics cause engine seals to leak. Synthetics absolutely do not cause seals to leak, they simply may only reveal an existing leak path and seal which has failed and is in need of mechanical replacement. Either the seal lip is worn down or the seal is hardened and cracked from old age, heat and ozone. What happens is exactly as we described above. If you have a very old engine that has been running petroleum oil, and it also leaks, for example around the rear-main oil seal, then chances are it will leak more with synthetic oil. This is commonly referred to a false seal. AMSOIL Synthetic Motor Oils are recommended for use in mechanically sound engines! If you have a vehicle that leaks oil excessively, then repair the seal prior to converting to AMSOIL.
-----------
[Rislone Ad] [http://www.rislone.com/engine.htm.] Rislone Engine Treatment will normally raise and even compression in the cylinders by freeing sticking valves, lifters and rings so that they seal better, thus improving smoothness and power. It reduces friction and wear, especially at start-up time, and maintains normal oil viscosity at engine operating temperatures. Rislone Engine Treatment helps keep engines clean for peak performance. Available in one-quart size and our 15-ounce, add-anytime formula.

Restores lost power in the average engine. = In the average engine, there is a gradual decline in power as deposits accumulate and miles and operating time build up. Quality of oil used, frequency of oil change, frequency and quality of tune-up, type of driving and the driver's operating habits all influence how little or how much power is lost. Rislone Engine Treatment will help restore lost power in the average engine however, it will not add power to a new engine or an engine in perfect condition.
---------
[http://www.imperialclub.com/Repair/Engine/flush.htm.] I have run into that situation on a V6 GM (wife's Olds Ciera). When we bought the car (used w/86K), it ran good. After a couple years, I replaced the valve cover gaskets. When I removed them, the crud was SO thick I literally could NOT see the valve springs. I mean, there was OVER 1" of crud everywhere. I simply could not believe it was still running. We nicknamed it "Sludgy the Whale". Soon after that, it developed a rod knock, so I replaced the engine. When I disassembled the old engine, the lifter galley was literally bridged with crud...bank to bank.. I don't think the oil was EVER replaced for the original 86K. I have used Mobil One since. Now with another 80K, the heads still look new. You might want to try one of those engine flush treatments (Rislone), but it may take several treatments to dissolve just some of that sludge. Of course, scrape and remove as much of it as you can from the heads before you continue.
-----------
[http://forums.p.legend.org/second/msgs/17772.phtml] Those additives seldom do anything for you, with a couple of exceptions....CD2 or Rislone can help clean up some of the gummy deposits in the engine oil passageways (uses similar detergents as used in motor oils, not the typical engine flush solvents that include xylene and kerosene, which actually wash away all your oil protection on bearings and journals as they dissolve crud...). Just a few minutes running with a solvent can score journals/bearings, damage seals.
---------
[http://archives.freaks.net/checker-l/1999/0664.html.] If it is the lifters, and the Rislone doesn't fix it, which it didn't on mine, we use the Bilstein [A complicated, garage-implemented procedure - RJ] engine flush system. Our 350 now sounds and runs like new, it even helped compression on one cylinder that was slightly low. We got out a lot of sludge and carbon build up when we did the treatment. There are a couple of other companies that also make engine flush systems, but Bilstein seemed to be the best of all we checked. Sure beats pulling an engine down to replace lifters!
---------
[http://autos.groups.yahoo.com/group/wetwesties/message/12273. ][About engine rebuilding, General Info purposes] run some Gunk / Siloo / Rislone Engine Flush through it, just follow the instructions. Change the oil and filter and run 1 quart of Marvel Mystery oil in it for about two hours (don't overfill the crank case) If you can't dive the car just start it up and run it long enough to get it to operating temp a few times before you pull the engine.
---------
[http://diesel.list.archives.mbz.org/1999/Jun/Vol_1_Num_109/.] Marvel Mystery Oil may be a lubricant, but as I understand it, it's just korosene with wintergreen and red stuff, like they use in an off-brand of strawberry yogurt. I have had good luck with sticking valves in Corvairs, but isn't the diesel fuel a lubricant.

[http://www.fixafordcar.co.uk/EscortOrion.htm.](For another vehicle)...changing the oil to 5W30...
---------------
[http://www.russellw.com/manuals/warner/engine_troubles.htm. ] Ascertain whether engine lubricating oil is correct grade or not.
----------
General Ignition Troubles Or Sticking Valves

With the engine idling, continued fluctuation of 1 to 2 inches may indicate an ignition problem. Check the spark plugs, spark plug gap, primary ignition circuit, high tension cables, distributor cap or ignition coil. Fluctuations of 3 to 4 inches may be sticking valves.
--------
[http://www.saabnet.com/tsn/faq/lhoverview.html.]
While performing vacuum testing, you should make sure that you are not contributing to any vacuum leaks or disrupting any sensor performance. With the engine idling, the following are general indicators of engine performance:

Good Operations - An engine in good operating condition should have a steady vacuum at about 16" to 22"Hg. Opening and closing the throttle quickly will cause the needle to drop to 2 and then come back to about 25.

Valve Problems - A 3 to 4 point intermittent drop of the needle denotes valves are sticking. Also, a consistent vacuum drop could indicate a burnt or leaky valve as the drop occurs when ever the bad valve comes into operation. Worn valve guides admit air which upsets the air/fuel mixture. Symptoms of worn valve guides are a variable vacuum at idle of about 3"Hg, but steady vacuum as rpm's increase. Weak valve springs will also have a rapid fluctuation between 10" and 21"Hg at idle, but vacuum becomes jumpy as rpm's increase. Any appreciable variation in valve timing will produce a low reading.

Ignition Timing - If the ignition timing is off, the gauge will show a steady, lower than normal reading.

Head Gasket Leak - Excessive vacuum variation at all rpm's could indicate a bad head gasket (i.e., leaking compression). The pointer will fluctuate between normal and a low reading. The needle will drop sharply about 10"Hg from a normal reading and return each time the defective cylinder or cylinders reach a firing position. A Saab technician can confirm a head gasket leak by performing a chemical test of the coolant fluid to test for exhaust in the coolant.
---------------
[http://members.aol.com/carleyware/library/vacleak.htm.] An oscillating vacuum reading usually indicates a leaky valve or badly worn valve guides

[http://www.atariarchives.org/cfn/12/03/0042.php.] A leaky valve, or jumped timing belt, can cause the same symptoms, as a faulty sensor, or burned out ECU.
------
[http://www.ford-trucks.com/dcforum/61_79/10775.html ] [A fluctuating vacuum reading} could mean, a stuck valve, bad lifter, bent push rod or a broken spring. All of these are (has Martha Stewart would say) "Are a bad thing.
-----------
[http://www.btinternet.com/~madmole/Reference/Idle.html ]

Wrong Oil.
If you have used too thick a grade of oil (Such as 15W/40) then this could effect the hydraulic valves, causing them to be sluggish until warm which could give a rough cold idle. This is what people think of as the "Sticking Valves Problem" a quick oil change to the correct viscosity oil will fix this. I've always used Mobil1 and would recommend it to anyone. Symptoms are valve rattle noises on start up which go when warm. If you don't cure this the the valves will wear and you'll have a permanent rattle.

Best prevention is to use the correct grade oil. Ford say that you should use a min of 5W winter rated oil (so 10W is bad). If you have put in the wrong oil or don't know what is in there then do an oil change using Halfords synthetic 5W-30 oil, leave this in for a couple of weeks to spread round and dissolve/pick up the gunk and then change again to your main oil (I'd recommend Mobil 1), don't forget to change the oil filters whenever you change the oil.
--------------
[Valve Repair...]

[http://www.avweb.com/news/maint/182894-1.html]
Remedial action: Repairing a stuck valve can be done without removing the cylinder from the engine. The procedure is described in Lycoming Service Instruction 1425 and consists of dropping the valve into the combustion chamber, reaming the guide, and then reinstalling the valve.
----------
[http://www.whittsflying.com/Pageb31%20Engines%20and%20Systems.htm.]

Valves usually stick in the valve guide. This shows to the pilot by an engine hesitation or miss. Something is making it so the valve cannot move freely. These may be bits of carbon or cooked oil. Early detection and correction of sticky valves is important.
-----
[valve test - simpler: http://www.geocities.com/vwresource/engine_wobble.]
Test for Cylinder Mis-Firing

(Sometimes called a "power balance" test.) This test provides a good indication of how much each cylinder contributes to the overall power output of the engine. In addition, it also isolates which cylinders contribute little to manifold vacuum.

You can perform this test at home on any VW engine except those with electronic ignition. If there is a suspected burned valve or other major problem, this quick and easy test will indicate which cylinder it is. Because VWs have only four cylinders, a faulty one will show up relatively quickly.

To perform a cylinder mis-firing test -

1. Remove all the spark plug leads from the spark plugs.

2. Set the leads lightly back on the tops of the spark plugs. This will enable the lifting of each lead off its plug without using too much force.

3. Pull the lead away from the plug one cylinder at a time, and ground the lead against the cylinder head. This will prevent that cylinder from firing. The engine will be running on only three cylinders as you test each cylinder sequentially.

4. As you disable each cylinder, listen to the change in engine rpm and performance.

If a cylinder is faulty, when it is disabled it will have little or no effect on the engine's speed or performance, as it will not be contributing fully to the overall engine power.

A dwell-tachometer will give a more accurate indication of changes in engine rpm as you conduct the test.
---------
[http://forums.vmag.com/mvsilhouette1199/messages/128.html ]

Re: 2000 Silhouette engine knock/tick [ Follow Ups ] [ Post Followup ] [ VMag WWW Bulletin Board ] [ FAQ ]

Posted by charles moore on November 03, 02 at 10:22:10:

In Reply to: Re: 2000 Silhouette engine knock/tick posted by Dave on August 29, 01 at 05:54:29:

: I have 1999 with 26k that has a knock on startup but once it is driven down the block the noise goes away. The dealer had the van overnight and upon their running it said the noise was not excessive and did not warrant any attention. He explained it as piston slap that is common for those engines when cold and would not effect the life of the engine. Good Luck in getting any resolution.

: : : I have a 2000 Silhouette with 5500 miles on it. I have complained to 2 dealers about loud valve train noise when cold. Upon pushing the issue - the dealer stated there is a documented replacement for the pistons due to skirt design and excessive noise. Has anyone else experienced this? If so did the new pistons help?

: : : Thanks!

: : Its a very common problem with the 3.1 and 3.4 V6s. Theres too much clearance in the piston wrist pins. GM says it wont have an effect on reliability or longevity but since you're still under warranty they're supposed to replace the engine if you want. Id do it! My moms Grans Prix started doing the same thing after the warranty. It runs great but she could never sell or trade it because it sounds like it has a bad engine.

I bought my 97 venture with 80,000 miles and shortly developed the tick,mine was diagnosed as a sticky lifter,i put a little transmission fluid in the oil twice and changed the oil, the tick has'nt returned, but now i have the bad intake manifold gasket , so my car is usless until i get 1000 bucks to fix it.
-------

[Valve Stem Seals...}

AVSOEM12209657000.bmp (75978 bytes)
[http://philip.greenspun.com/materialism/cars/sienna.] Leaky valve stem seals allow oil to seep into the piston chambers and burn out of the exhaust as white smoke. As this problem gets worse, more and more oil continues to seep out of the engine. He was wrong in his assessment that the vehicle would be safe to drive. Further erosion of the valve stem seals eventually caused the engine to sludge.
------------------
[http://www.cobralads.com/butcher59.html.] Valve Stem Seals. These are plastic or rubber caps that seal the valve. I am not clear on their purpose...spacing, air control, or oil control? I can say that they are devilishly hard to remove and just as hard to install
-----------
[www.autosite.com/garage/encyclop/ency01p.asp ] Failed valve stem seals are by far the most common cause of oil burning, so you need a good understanding of these little parts. First off, in cases where the guides are in bad shape, new seals will be no more than a temporary measure a band-aid on a bullet wound.

Although plenty of people still believe these oil barriers are only important on intakes, it's been proved that a considerable amount of liquid lube can be drawn past exhaust valve stems by the vacuum pulses present between the "slugs" of waste gases. One study showed that consumption jumped from 2,100 to 450 miles per quart when the exhaust valve seals were removed.

There are two basic designs, the deflector or umbrella type, and the positive variety. The former fits tightly on the valve stem and rides up and down with it, while the latter is secured to the guide boss, and the stem slides through its hole. It's important with either type to use one of those little plastic installation sleeves so you don't tear up the seal as you slide it over the keeper grooves.

[RTV = Room Temperature Vulcanizing]
---------

[http://www.thefieroclub.com/osg/fiero_osg/valve-stem-seals.html.]

Presuming that the trouble was not temporarily caused by a sticky oil control ring (which can happen on a car that's sat for some time), this is usually due to bad valve stem seals, worn valve guides, or both. Some of the oil that has collected in the head drains into the cylinders past the broken seals and/or worn guides after the car has been shut off. This also happens when decellerating and in high rpm, high vacuum, low throttle position situations like highway driving as oil gets sucked past the seals and guides due to high cylinder/manifold vacuum. Conversely, since city driving is fairly low rpm, high acceleration, the engine spends more time in low vacuum states; reducing oil consumption from bad valve stems seals or guides.

This is a pretty common occurance for Chevrolet engines after 80-90k miles and can often be cured by replacement of just the valve stem seals. An air compressor, a special hose that fits into the spark plug holes, and a valve spring compressor are the special tools required to do this job. If these tools and a little mechanical expertise are available to you, the job is pretty cheap and easy to do -- around $50; although some danger of stepping on a "near and dear bodily part" exists in dropping a valve into the engine; which would force you into removing the cylinderhead and would make this job MUCH more difficult. :)
-----------

TO MESSAGEBOARD > > >

HOME